Why Proprietary ODM Metal Stamping Designs Can Save You Months in Lead Time
Why Bracket Tooling Timelines Can Sink Your Metal Stamping Schedule Before First Sample Approval
Precision engineering and springback calculations eliminate late-stage tooling adjustments.
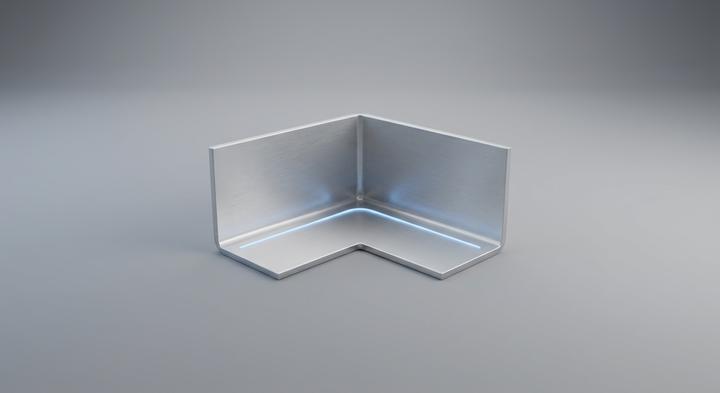
An out-of-spec 90-degree bend that rebounds to 92 or 93 degrees because of uncompensated material springback will turn a cheap structural bracket into a massive, line-stalling assembly bottleneck. When a bracket design fails to account for the specific sheet metal alloy’s natural elasticity, assembly robots downstream will reject the misaligned mounting holes instantly. To clear first Sample Approval Uncompensated springback forces must be engineered out of the tool path from day one, not modified on the fly after the progressive die has already been hardened.
Deciding when to transition from laser-cut prototyping to hard stamping dies comes down to a clear inflection point between labor and tooling costs. For volumes under 1,000 units, laser cutting paired with CNC press brake bending is unmatched because it completely sidesteps tooling investments. Once your production run scales past 5,000 units, the manual setup and cycle times on a press brake become prohibitively expensive, making dedicated hard-stamping tooling a financial necessity. However, a common trap for procurement teams is accepting the lowest initial tooling quote, which almost always hides a total lack of mold-flow, springback, and DFM planning—leaving you to pay for expensive recuts later.
This is where factory-direct DFM engineering checks protect your schedule. At WenXinDa, we analyze grain direction, minimum bend radii, and raw material elasticity before a single block of tool steel is machined. This technical scrutiny helps buyers make the right economic trade-off between high-cost progressive dies, single-stage bend tooling, or hybrid CNC machining. A solid rule of thumb to bring to your next vendor call: if a supplier’s tooling quote cannot produce calculated springback compensation angles for your exact alloy grade, they are simply passing the cost of late-stage modifications back to your timeline.
The Amortization Threshold: How Volume and Part Complexity Dictate Your Stamping Path
How do you calculate the exact volume crossover point where progressive die stamping becomes cheaper than stage tooling?
A unit-price amortization curve looks great on a spreadsheet, but it falls apart completely if the die crack-fails halfway through the run. We often see buyers treat tooling depreciation as a pure math problem, ignoring how material thickness and part complexity dictate your actual tool wear. Blanking a structural bracket from 4.0 mm carbon steel, for example, puts massive shear load on the tool compared to a standard 1.2 mm chassis part—meaning you are trading tool life for part strength from day one. When selecting your metal stamping path. How volume and thickness interact is what determines whether a low-cost stage die is actually cheap, or just a ticking clock.
For low-volume runs under 10,000 units, simple stage tooling (typically using Cr12MoV or D2 Tool Steel) keeps upfront capital exposure low despite higher manual labor costs per hit. Once production scales past 50,000 units, progressive dies become the only logical choice, amortizing their steep initial cost across millions of high-speed hits. However, geometry limits apply: a 6.0 mm plate will destroy a standard progressive tool’s feeding mechanism, while a multi-slide machine is generally restricted to thinner bands under 2.5 mm.
| Tooling Approach | Volume Crossover (Units/Year) | Tool Steel & Expected Die Life | Thickness & Geometry Limits | T1 Sample Timeline (Days) |
|---|---|---|---|---|
| Simple Stage Die | Under 10,000 units | Cr12MoV / D2 50,000 – 100,000 strokes |
Max thickness: 6.0 mm Simple 90-degree bends only |
10 – 15 days |
| Multi-Slide / 4-Slide | 10,000 – 50,000 units | D2 / SKD11 250,000 – 500,000 strokes |
Max thickness: 2.5 mm Complex, multi-directional bends |
25 – 30 days |
| Progressive Die | Over 50,000 units | SKD11 / Carbide inserts 1,000,000+ strokes |
Max thickness: 4.0 mm High-precision, progressive geometries |
30 – 45 days |
Choosing the correct tooling progression path protects your amortization timeline.
Finding the Tooling Sweet Spot
Ultimately, the decision isn’t just about the number of parts; it’s about whether the die can physically survive the volume. If you commit to a progressive die for a 4.0 mm heavy-gauge bracket, make sure the toolmaker specs premium SKD11 or carbide inserts at the high-wear blanking and bending stations. Trying to shave 15% off the tooling quote by opting for lower-grade tool steels will almost always guarantee micro-chipping and dimensional drift long before the die pays for itself. If your volume crossover is borderline but the geometry is highly complex, splitting the operations across separate stage dies or a multi-slide setup is often the safer way to protect your margin.
Prototyping to High-Volume Runs: Structural Brackets Under Different Production Runs
A revision notice hitting the stamping floor during a pre-production run is the ultimate test of a supplier’s tooling agility. When procuring structural brackets, a buyer’s engineering challenges change dramatically as production moves from initial concept validation to massive automated assembly lines. A supplier’s true capability is not measured merely by the physical size of their presses, but by how effectively they align their manufacturing methods with the design maturity of the component.
Rapid Scale-Up for EV Battery Brackets (500 to 2,000 Units)
On a 500-unit pre-production run for an electric vehicle battery tray, committing to permanent tool steel is an expensive trap when the chassis geometry is still evolving. Utilizing laser-cut blanks and modular stage-bend tools allows the manufacturer to absorb frequent structural revisions with negligible tooling costs. While the per-part cost is higher than an automated run, this agile approach provides the flexibility required to validate the physical assembly under real-world testing conditions. Once the battery bracket design stabilizes and volumes scale up to 2,000 units, the manufacturing data collected directly informs the design of the high-volume progressive tooling, preventing late-stage modifications.
High-Volume Telecom Brackets (50,000+ Units)
When production volumes scale past 50,000 units, the primary risk switches from design instability to microscopic tool wear that throws tolerances out of spec. At this volume, high-speed progressive dies made of premium tool steels like SKD11 are essential to maintain a competitive unit price and sub-millimeter repeat accuracy without micro-chipping or dimensional drift. This high-volume discipline ensures that the 50,000th structural bracket matches the tight physical tolerances of the first sample, protecting automated assembly lines from manual rework. The massive upfront tooling amortization is offset by the low per-part cost and absolute dimensional consistency.
Integrated Post-Processed Runs Requiring Single-Roof Accountability
The most common failure point for high-precision structural brackets occurs when a stamped component must undergo secondary CNC milling, thread-tapping, or precision boring by a separate vendor. If one shop stamps the blank and another performs the machining, any alignment defect results in split-vendor finger-pointing. Utilizing an integrated facility like WenXinDa’s Dongguan factory—which houses sheet metal prototyping, high-tonnage stamping presses, and secondary CNC machining centers under a single roof—eliminates this risk. Having one engineering team control the part from the initial flat layout through to final post-machining tolerances ensures absolute accountability. A useful rule of thumb is that if your bracket requires secondary machining, the supplier who stamps the blank must also assume responsibility for the final machined tolerances.
Dimensional Drift and Split-Vendor Finger-Pointing: Stamping Pitfalls in Custom Bracket Procurement
Splitting production steps is the fastest way to invite Dimensional Drift and Stamping Pitfalls into your assembly line. For volume programs, Custom Bracket Procurement Dividing up the tooling, the stamping, and the secondary machining across different shops creates a classic Vendor Finger pointing loop when parts fail to fit. When a high-volume line stalls because a bracket won’t mate with its enclosure, you lose thousands of dollars in engineering downtime, not just the unit price of the bracket. Procurement teams often buy these steps as isolated transactions, ignoring the physical reality that every bending, tapping, and cutting step influences the next.
Design changes are cheap to implement if they are made before the progressive die runs first parts.
Retrofitting a hardened progressive die for a late design revision can easily cost up to 80% of the initial tooling price. Once the tool steel is hardened to 58–62 HRC, you cannot simply machine a quick change. It requires wire-EDM cutting new inserts, milling out pocket clearances in the die set, and regrinding adjacent stations, which degrades the structural integrity of the tool and stalls your timeline by weeks. A manufacturing partner like WenXinDa avoids this modification penalty by running springback and formability simulations before cutting steel, ensuring the tool is built correctly from day one.
Sourcing raw stamping from one shop and secondary tapping or machining from another keeps total cost low.
This split-vendor approach introduces severe tolerance stack-up risks that make quality audits almost impossible to resolve. When a tapped thread sits off-center on your assembly floor, the secondary machining shop will blame the stamping shop’s blank flatness, while the stamping shop will point to the machinist’s fixture alignment. Bringing both processes under a single turnkey manufacturer like WenXinDa eliminates this friction by maintaining a single chain of dimensional custody from the raw coil to the final post-processed bracket.
Standard deburring callouts are sufficient to ensure stamped brackets feed cleanly through automated assembly lines.
Vague ‘deburr all sharp edges’ notes on a print will eventually jam your automatic bowl feeders and pick-and-place systems. Without explicit burr height limits—typically capped at 10% of material thickness—and a defined tumble-deburring or vibratory finishing spec, you will receive brackets with micro-flares that snag during automated assembly. Define your maximum allowable burr height and edge radius on the initial drawing so the stamping team can schedule die sharpening before the tool starts punching out out-of-spec parts.

Single-roof manufacturing ensures that final machined parts align perfectly with original tolerances.
Auditing Your Metal Stamping Partner: The Factory-Floor Verification Protocol
How do you verify if a Chinese metal stamping factory actually has the on-site capacity to run your project?
To bypass broker promises, a physical or virtual audit must focus on asset ownership and maintenance documentation. A common pitfall in metal stamping procurement is relying on high-resolution equipment photos that actually belong to a subcontractor three blocks away. A thorough audit verifies the physical press lines, tooling shop capability, and material traceability.
| Factory Audit Focus | Verifiable Proof Needed | Common Red Flags | The WenXinDa Baseline |
|---|---|---|---|
| Press Capacity | Equipment asset ledger, nameplate photos matching on-site machinery, and tonnage calibration logs. | Claims of “joint-venture” press facilities or refusal to show a continuous video walk of the active stamping floor. | Direct-to-factory access to on-site mechanical and pneumatic presses ranging from 45T to 300T+ with verified calibration schedules. |
| Tooling Shop & Maintenance | In-house wire-cut EDM, surface grinders, and radial drills with dedicated tooling technicians on the payroll. | Stamping suppliers that must ship dies out to a third party even for simple deburring adjustments or minor springback corrections. | Fully staffed, in-house die shop executing real-time tooling maintenance, progressive die adjustments, and rapid T1 sample corrections. |
| Material Traceability | Certified Mill Test Reports (MTRs) showing mechanical and chemical properties linked directly to heat numbers stamped on physical steel coils. | Generic material certificates that lack corresponding coil heat numbers or blank physical coil labels. | Stringent material control protocols matching raw steel coils to the production run, with full material test documents provided with every shipment. |
Buyers can schedule a live video audit with WenXinDa to inspect these press lines, tooling capabilities, and material tracking logs in real time [1]. Having engineering teams verify these physical assets before launching a custom metal stamping run prevents the typical quality and timeline slips common in outsourced production.
Securing Your Custom Metal Stamping Pipeline: Precision Execution with WenXinDa
Once the physical press capacities, toolroom capabilities, and material heat numbers are verified on the factory floor, the final step in protecting your supply chain is establishing a direct, unmediated communication channel with the production team. Working directly with a Chinese manufacturer like WenXinDa, rather than a trading broker, keeps critical technical requirements from getting lost in translation. When your engineering team can discuss flat patterns, bend allowances, and tolerance stacks directly with the specialists who design and maintain the tooling, the risk of dimensional drift on your assembly line drops dramatically. This factory-direct access ensures your bracket designs are always matched to the most cost-effective production path, whether that requires high-volume progressive die stamping, flexible sheet metal fabrication, or secondary CNC machining.
To test this engineering-first approach before allocating your tooling budget, submit your current bracket drawings—including 2D print layouts with critical tolerances and 3D CAD files in .step or .stp format—to the WenXinDa technical team for a practical design for manufacturability (DFM) review. We will evaluate your flat patterns, material bend radii, and springback allowances to ensure your parts run predictably from the very first strike.